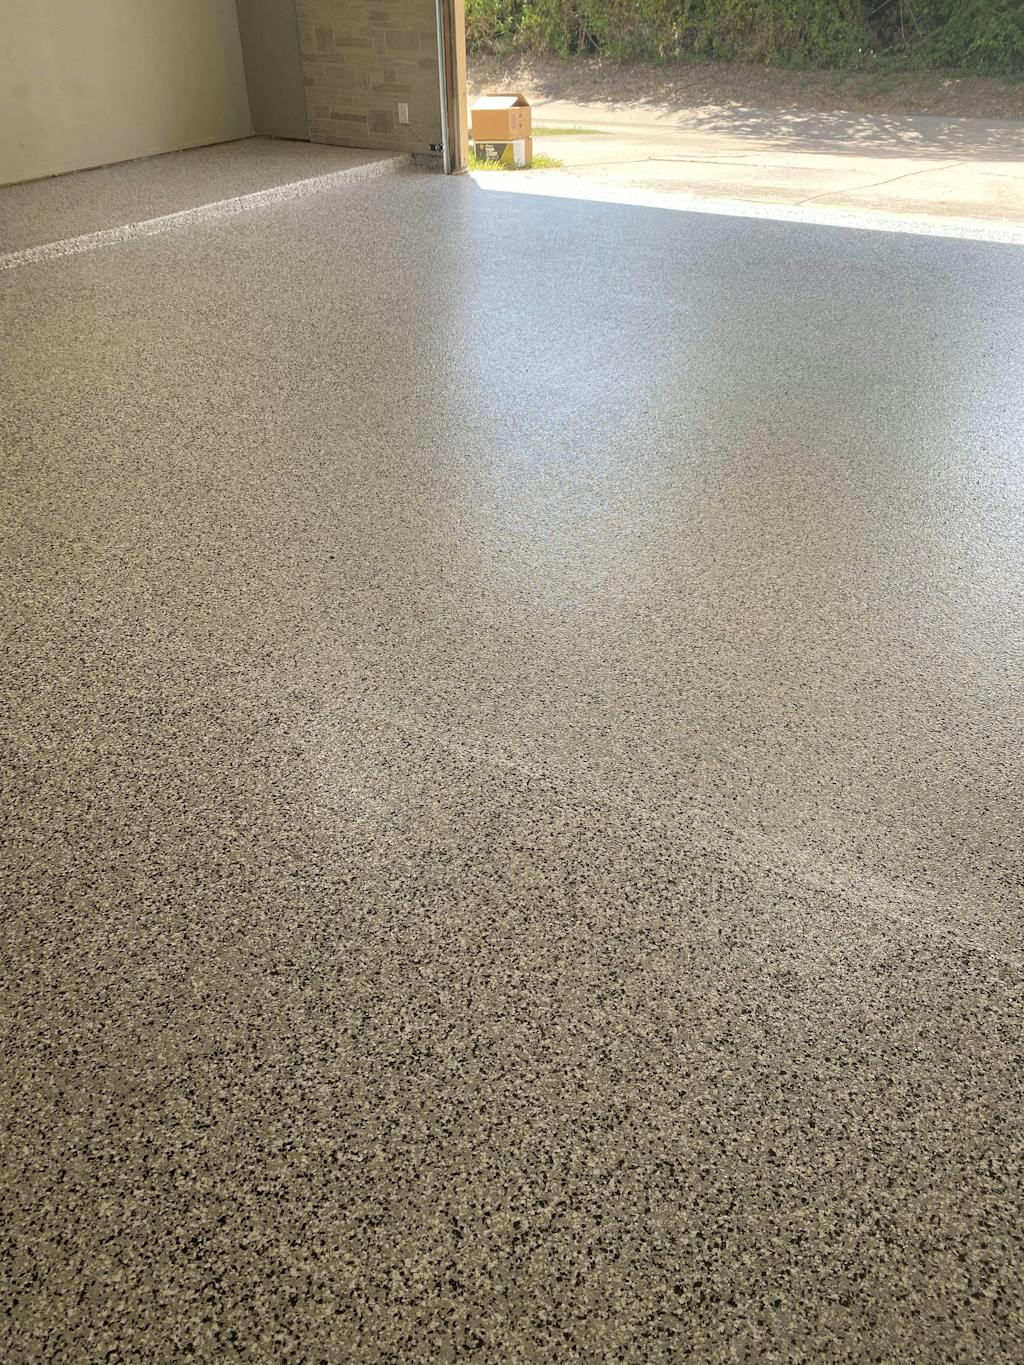
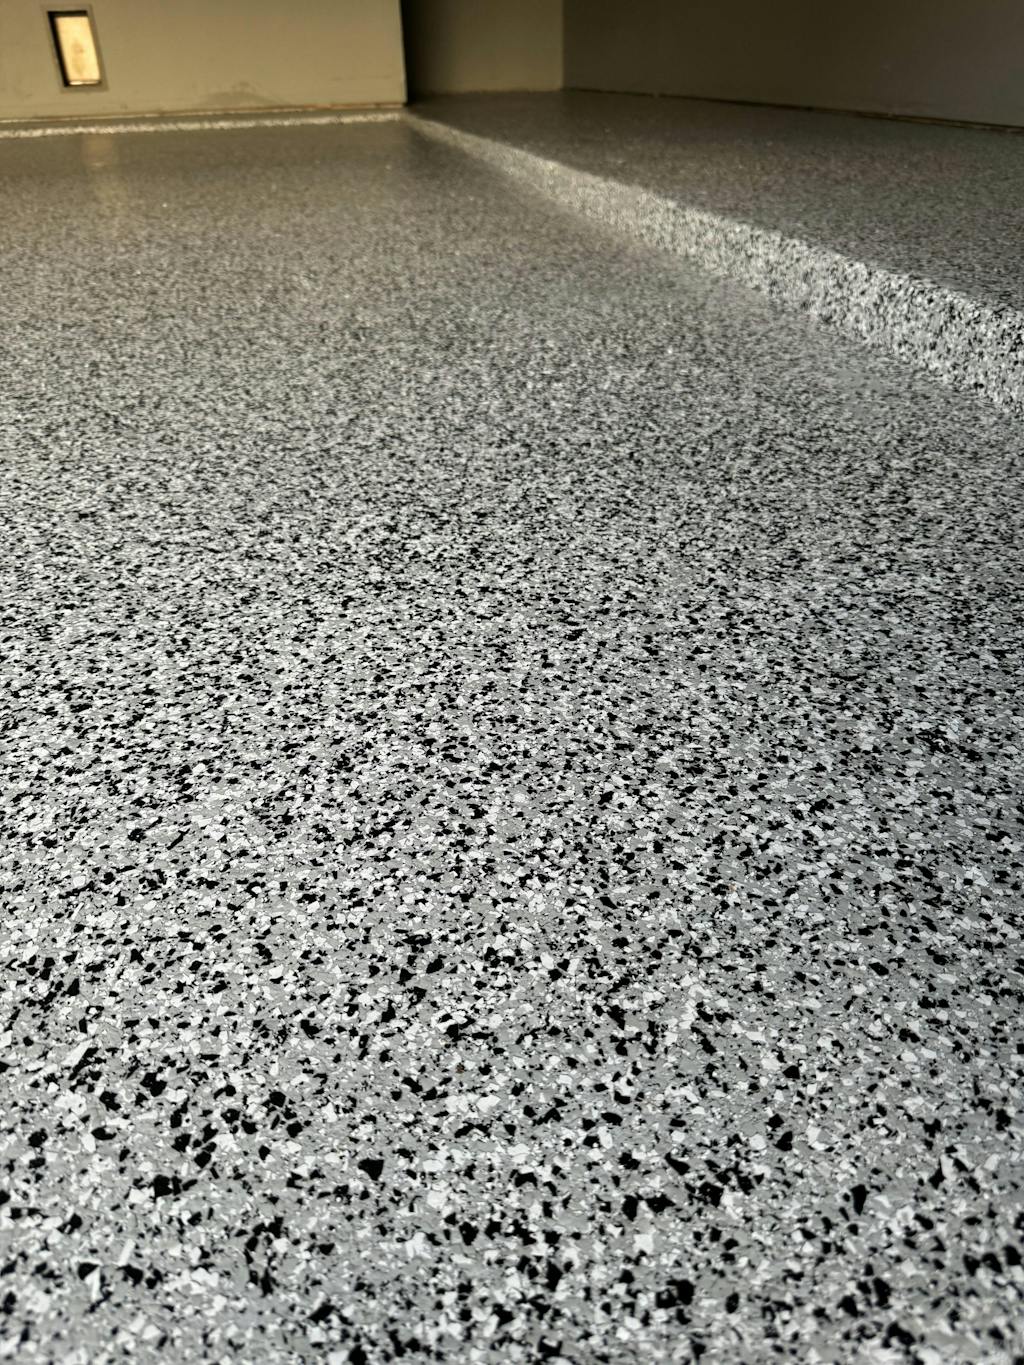
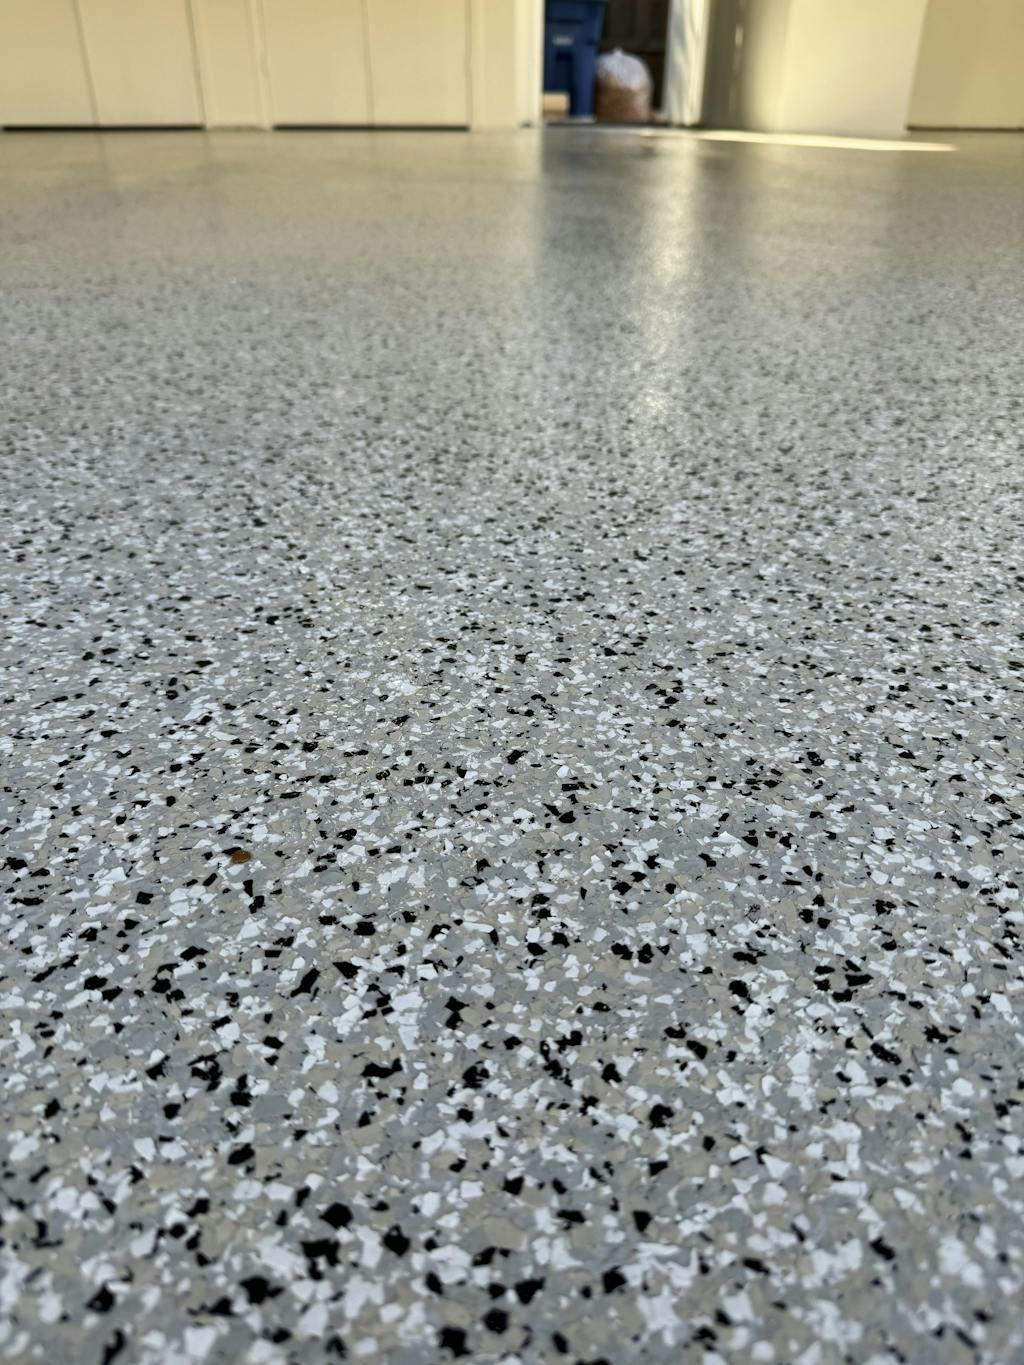
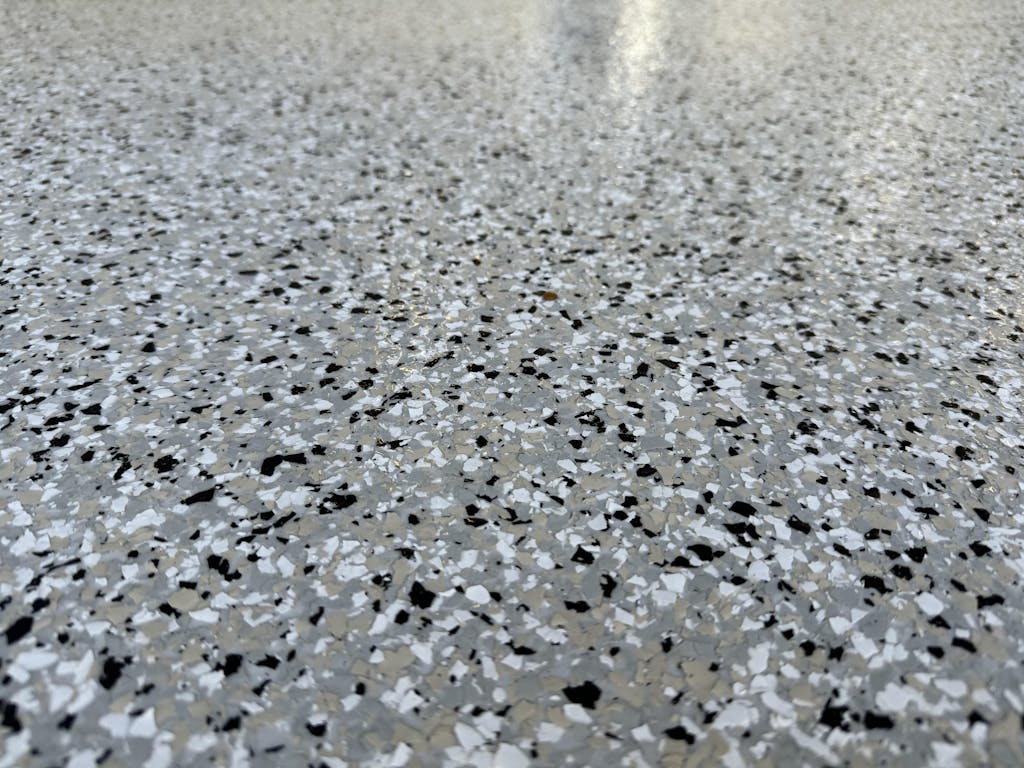
DIY 2K Epoxy Flake Floor Kit for Garages & Warehouses
- Slip-Resistant Technology: Provides a durable, non-slip surface for enhanced safety in garages and warehouses, reducing the risk of accidents.
- Professional-Grade Protection: Offers resistance to chemicals, water, abrasion, and impact, ensuring longevity and minimal maintenance.
- DIY-Friendly Application: Easy-to-apply system with clear instructions, perfect for DIY enthusiasts seeking a professional-grade finish.
- Trusted Expertise: Developed by industry experts with over 15 years of experience in floor safety solutions, ensuring reliable performance.
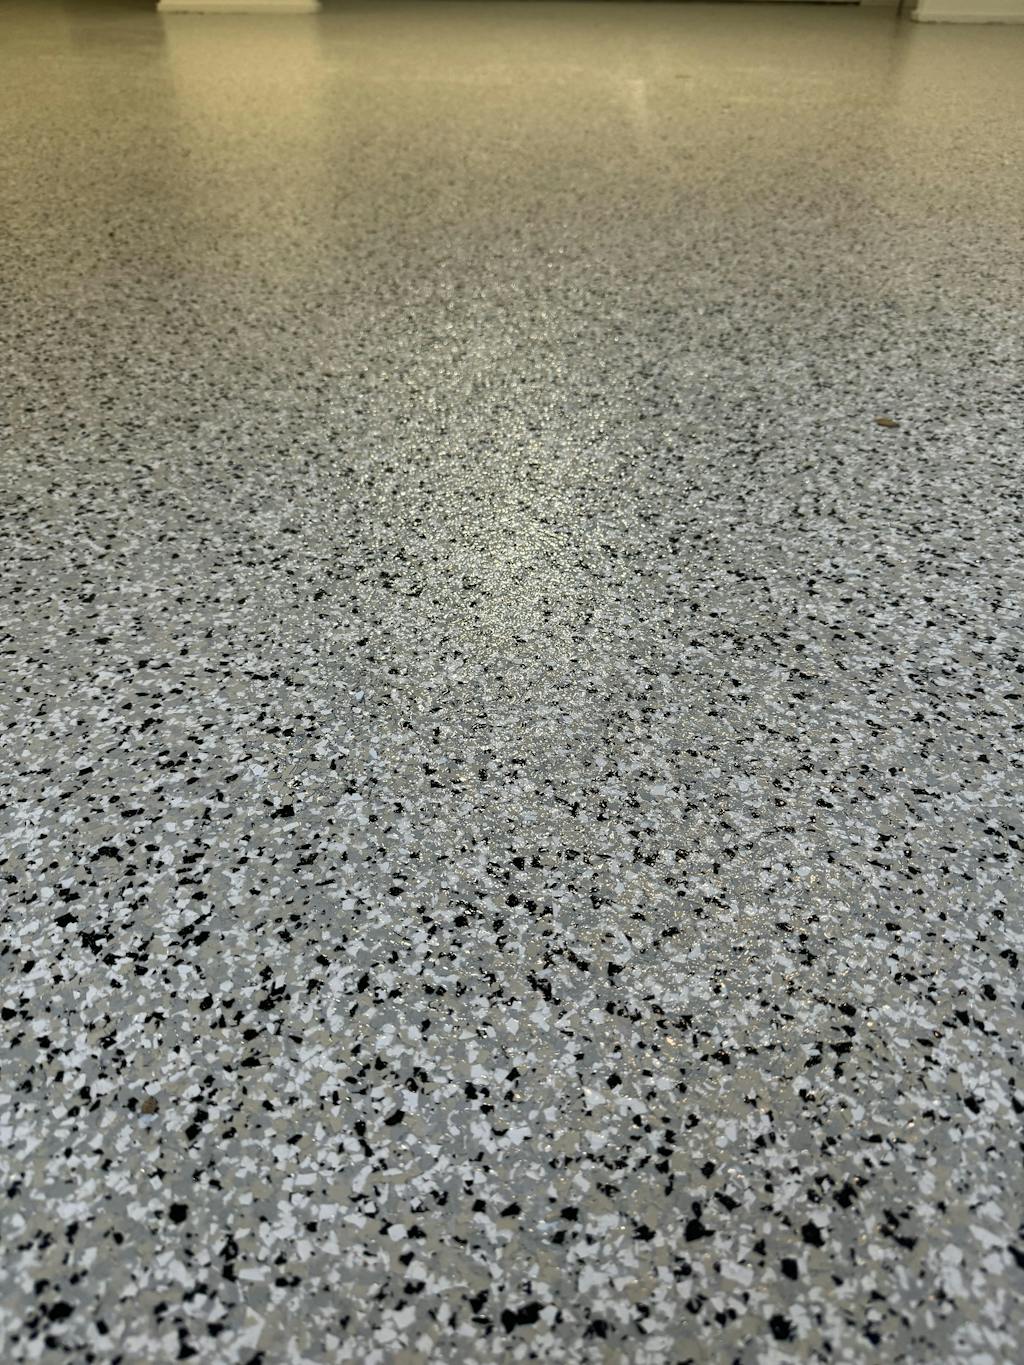
- Attractive Finish Options: Available in a variety of flake colors, creating a visually appealing and customized look for any space.
- Single Kit (No Flakes): Up to 100 sq. ft.
- One Car Garage: Up to 300 sq. ft.
- Two Car Garage: Up to 500 sq. ft.
Transform your garage or workspace with the SlipDoctors DIY 2k epoxy flake kit, a premium yet user-friendly solution requiring minimal prep for new concrete surfaces. Designed for DIY enthusiasts, this kit allows you to completely revitalize your concrete floor in just two days, making it a quick and efficient option for both personal and professional spaces. With its high-quality, three-step epoxy system, it not only enhances the appearance of your garage but also delivers an industrial-grade anti-slip surface, perfect for high-traffic areas like garages, hobby shops, and warehouses.
Engineered for durability and ease, the SlipDoctors epoxy kit provides superior chemical and water resistance, making it ideal for areas prone to spills or heavy-duty use. The high-gloss finish ensures effortless cleaning and reduces maintenance, while the non-chalking, non-yellowing formula keeps your floor looking fresh for years. Plus, the advanced non-slip properties enhance safety, ensuring excellent traction even in wet conditions. Designed to withstand abrasion and impact, this DIY kit provides a long-lasting, professional-grade floor finish that’s easy to apply, durable, and safe.
While this kit is designed to be straightforward for DIY application, taking the time to correctly assess and profile your concrete before you start is the step that makes the biggest difference to the finished result. Download our Concrete Surface Preparation & Coating Guide to understand what to look for on your concrete and how to get it ready for a smooth, professional application.
Step 1: Most Important
- All dirt, oil, dust, foreign contaminants, and laitance must be removed to assure a trouble-free bond to the substrate. Diamond Grind concrete floor.
- TECH TIP: If renting diamond-grinding equipment, request a diamond grit between 15 and 30. EDCO® & Husqvarna® brands are very effective and are commonly found at rental locations. “Planetary” style machines are the most efficient.
Step 2:
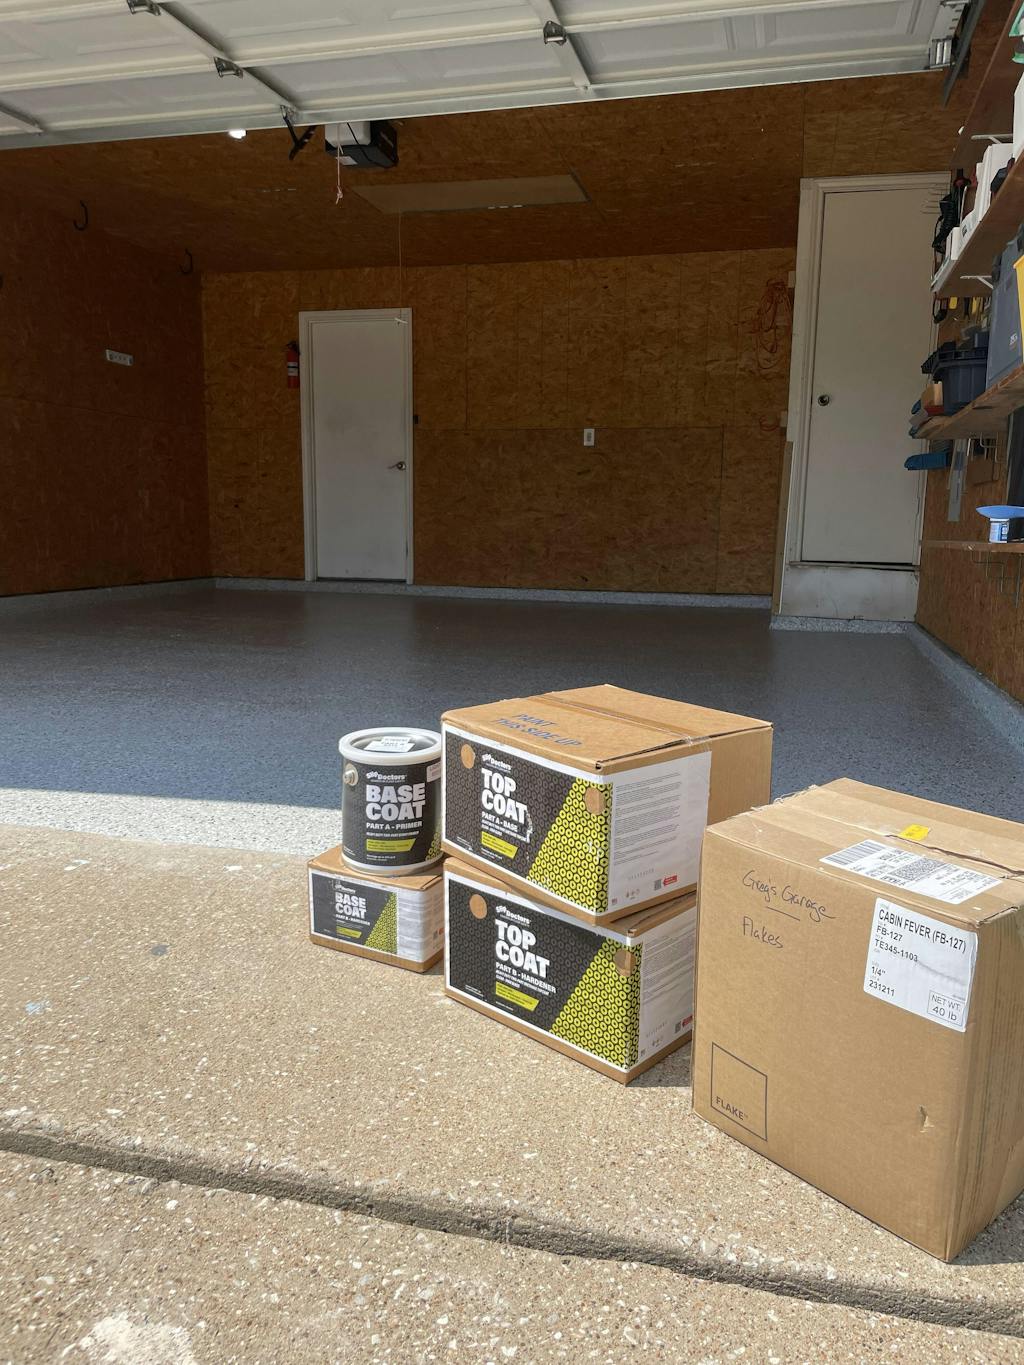
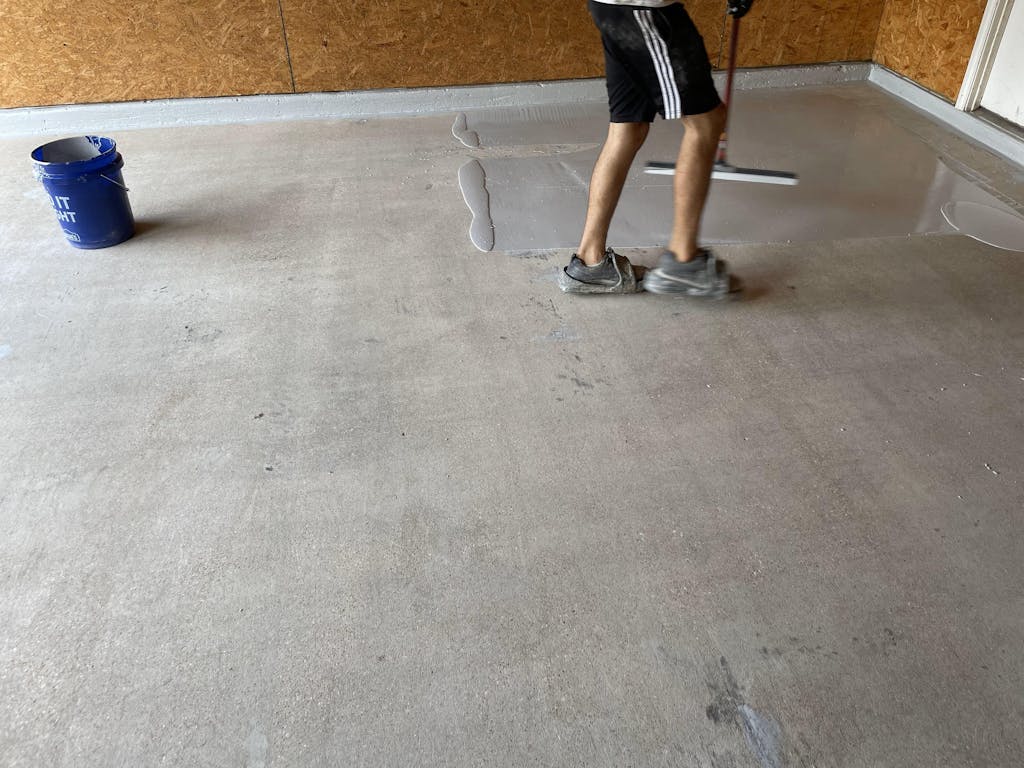
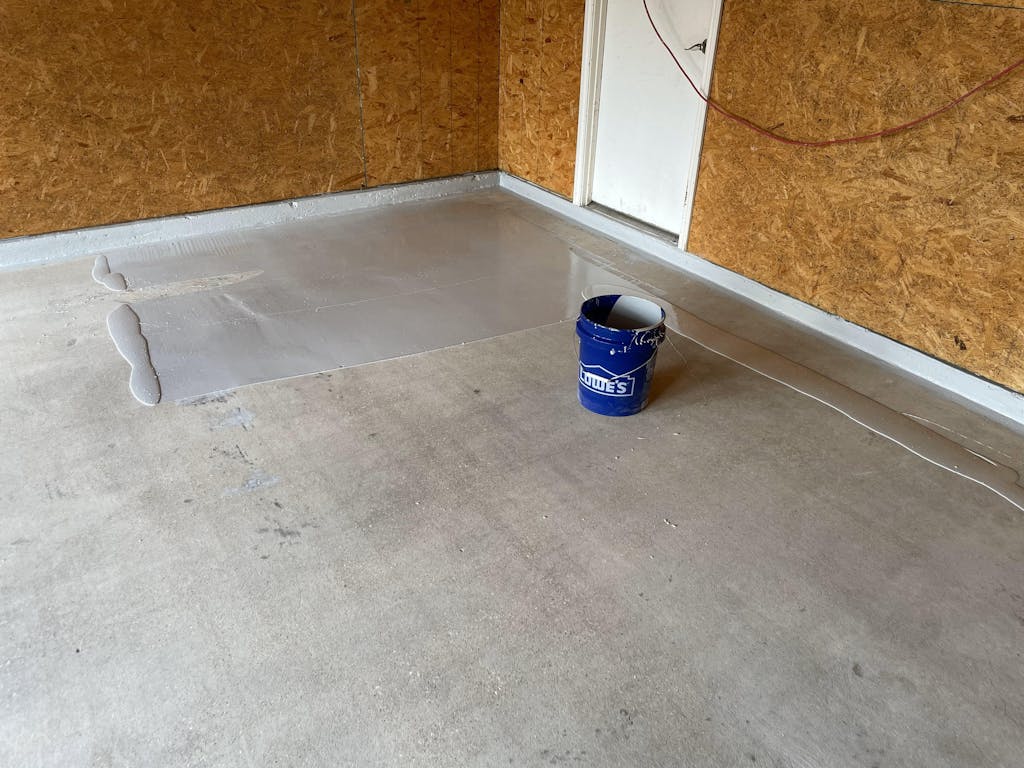
- Mix Base Coat: Prior to mixing, make sure the mixing pail (4-5 gallon pail) is clean and free of any debris. Pour and mix (1) Can Base Coat Part A with (1) can Base Coat Part B in the clean mixing pail. Mix well using a proper mix wand attached to a drill, making sure to scrape the sides and bottom of the mixing pail thoroughly. Any unmixed liquids (check the sides of the pail) will not cure properly. Mix for approximately 3 minutes. Do not use partial kits. This product has a working life of approximately 30-35 minutes at 75ᵒF when applied correctly.
- Pour a ribbon of the mixed epoxy onto the prepared surface. Meter it out roughly using a flat squeegee, then roll coating out with a 3/8” nap roller. Using a small brush to cut in around the edges and areas where the roller will not reach. As you roll out the mixed material, you can begin broadcasting flakes into the wet epoxy. To do this, spread the flakes by tossing them slightly up into the air and allow them to settle into wet epoxy as you progress.
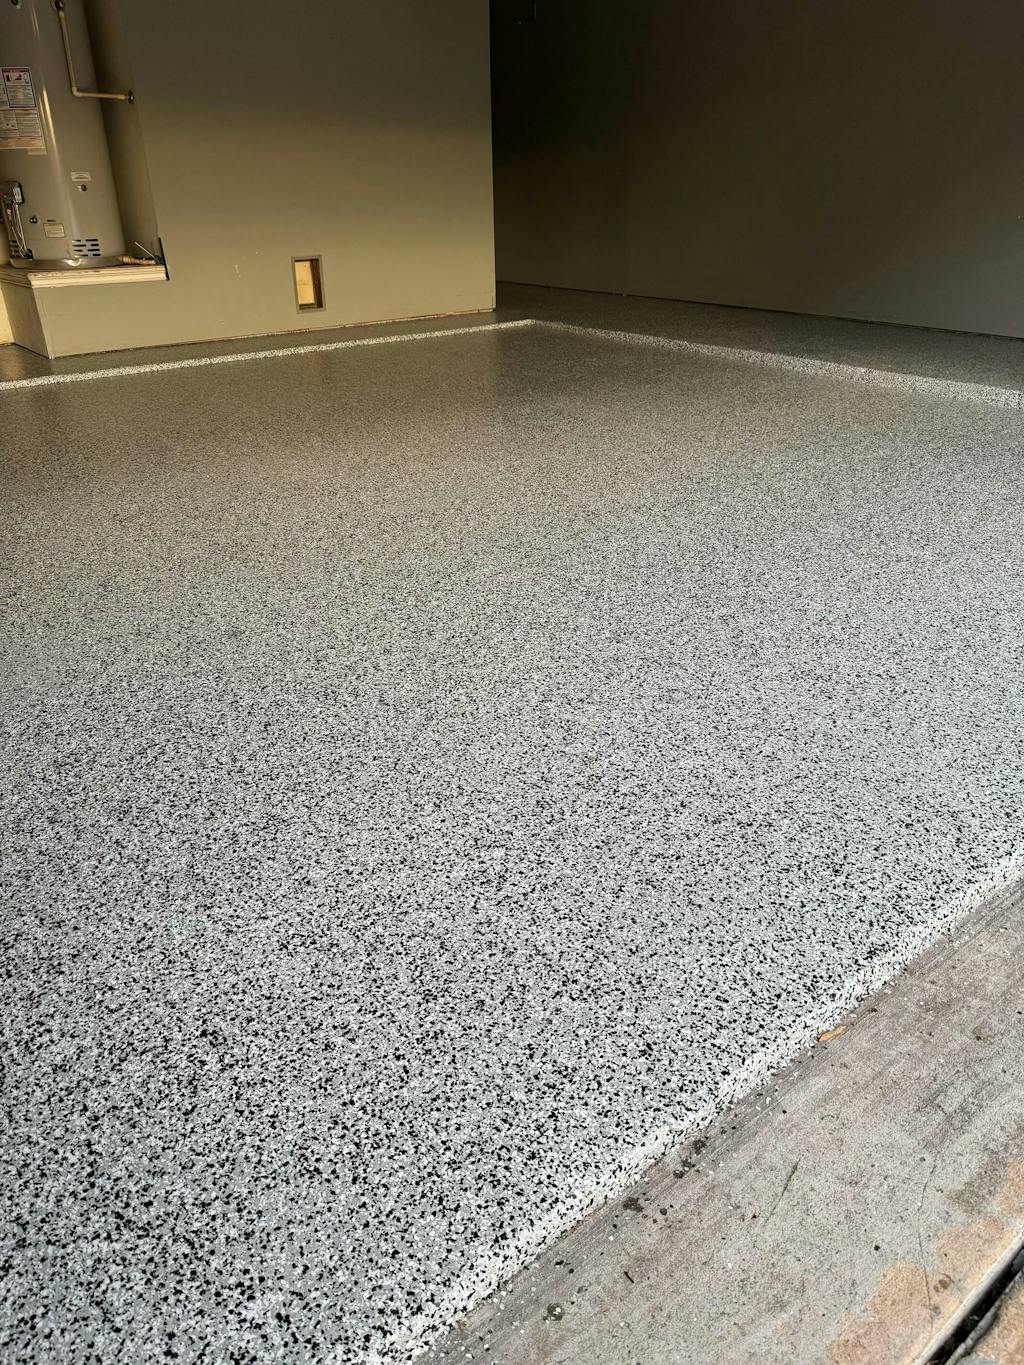
- Do not roll over the top of the paint flakes once they are on the floor. Estimate the flakes to use to ensure they are evenly spaced and to prevent running out of flakes before the end of the coated floor. The objective is to completely cover the epoxy with flake. We recommend 50 lbs of color flake for every 500 sq ft.
- THIS PRODUCT WILL CURE PREMATURELY IN THE BUCKET IF IT IS NOT POURED OUT ASAP!
- When applied at 70ᵒF, this material will be ready for recoat in approximately 10-12 hours. It is best to test the coating before recoating. This can be done by pressing on the coating with your thumb to verify that no fingerprint impression is left. If no impression is created, then recoat or application of the Top Coat can begin. Always remember that colder temperatures will require more cure time for the product before recoating or top coating can begin. DO NOT WAIT LONGER THAN 24 HOURS TO APPLY THE NEXT COAT WITHOUT FURTHER PREPARATION STEPS.
- TECH TIP #1: You can walk into the wet coating using a pair of “spike shoes” that will allow you to apply the flakes after rolling to make the process easier. BE CAREFUL! Floor will be slippery even when wearing spike shoes!
- TECH TIP #2: If your coating “rises” above the flakes causing a wet spot, just add more flakes to that area until the coating settles.
- TECH TIP #3: Consider this coat the “glue” for the flakes. It does not have to look pretty, just completely coated.
- TECH TIP #4: NEVER WORK FROM A MIXING BUCKET! ALWAYS APPLY DIRECTLY TO THE FLOOR IN RIBBONS!
Step 3:
- Once the Base Coat has cured and the floor is not sticky/tacky (approximately 10-12 hours), it is time to remove the excess flakes.
- Using an electric blower or a good push broom, begin gathering up the loose flake. This flake can be captured and used on a future project. Once the loose flake is gathered, the floor should be lightly sanded or scraped using light pressure. If sanding: use a drywall-style plastic pole sander with an 80 grit sanding screen. If scraping, use a 14” wide steel floor scraper. Always keep pole at a low angle to the floor. Larger spaces can be “buffed” in lieu of sanding/scraping using a buffer with a stiff brush head.
- The floor should be sanded or buffed in a north-south direction and then again in an east-west direction. Once fully sanded or scraped, the loose and broken flake should be gathered and discarded.
- TECH TIP: If any areas are “bald” of flake, dab area with clear coating and place enough flake to cover. Do this 15-20 minutes before the clear Top Coat application.
- TOP COAT – 1ST COAT: Top Coat comes in a 1.5 gallon kit. Using a new mixing bucket, mix Top Coat Part A, Top Coat Part B, and Clear Additive and mix well. Pour mixed material on the floor in a bead pattern similar to Base Coat. Apply using a 3/8” nap roller in the same manner as Base Coat. Estimated coverage on the 1st coat is 300-330 sq ft per 1.5-gallon kit.
- TOP COAT – 2nd COAT: Allow 1st coat to dry for 12 hours. Then, using a second Top Coat 1.5-gallon kit, mix components as previously described. Apply the 2nd coat of Top Coat in the same manner as the 1st coat. You will get much better coverage on the 2nd coat. Estimated coverage on the 2nd coat is 360-400 sq feet per 1.5-gallon kit.